Deploy a Smart Contract on Volta with Remix
Below are steps to deploy a smart contract on the Volta Test Network (the test network for the Energy Web Chain) using Remix. Remix is a web application used to compile, deploy and test smart contracts on Ethereum networks.
In order to deploy a smart contract to the Energy Web Chain Main Network, rather than the Volta Test Network, the steps are identical, except that you will connect your MetaMask to the Energy Web Chain rather than to Volta. We recommend that you always deploy and test your smart contracts to Volta first to make sure they behave as expected.
Once your smart contract is deployed, you can use the contract's ABI and address on the blockchain to interact with its public methods. For more information on how to interact with smart contracts, go here.
1. Configure MetaMask to connect to the Volta Test Network
You can see steps for doing this are here. If you do not have a MetaMask installed, you can do so here.
2. Get Volta Tokens
You will need Volta tokens to to pay for the transaction fee for deploying the smart contract to the blockchain. For directions on how to get Volta Tokens, go here. To learn more about what transaction fees are, you can go here.
*Note that if you are deploying to the Energy Web Main Network, you will need to have EWT.
3. Navigate to remix.ethereum.org
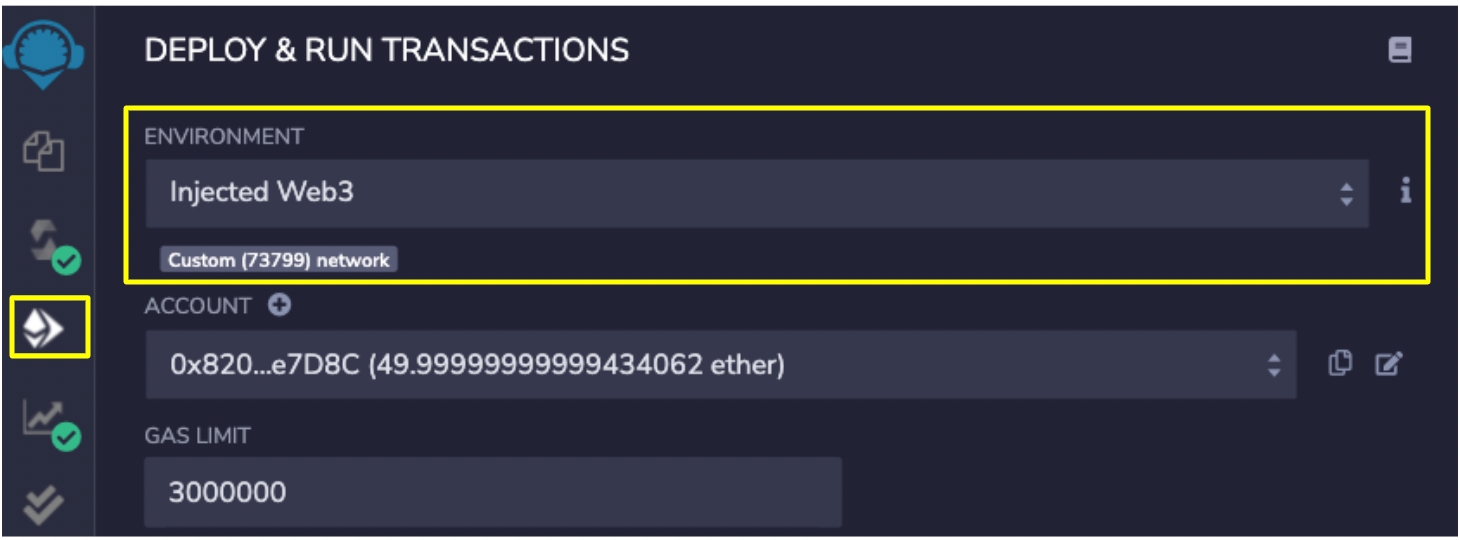
4. Navigate to the "Deploy and Run Transactions" icon on the left panel (shown below).
In the "Environment" dropdown, selected "Injected Web3". Notice that when you select this, "Custom (73799) network shows up. 73799 is the Volta Test Network - this confirms that we are connected to the Volta network via MetaMask.
5. Confirm the connection on MetaMask
You will need to confirm the connection to MetaMask.
6. Create a simple smart contract
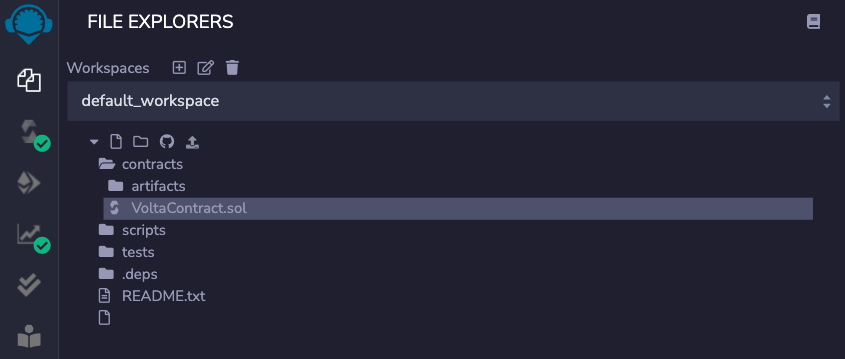
Go to the file explorer panel (select the first icon on the left panel). Add a new .sol file in the 'Contracts' folder. Below it is called VoltaContract.sol.
In the .sol file, add the following code:
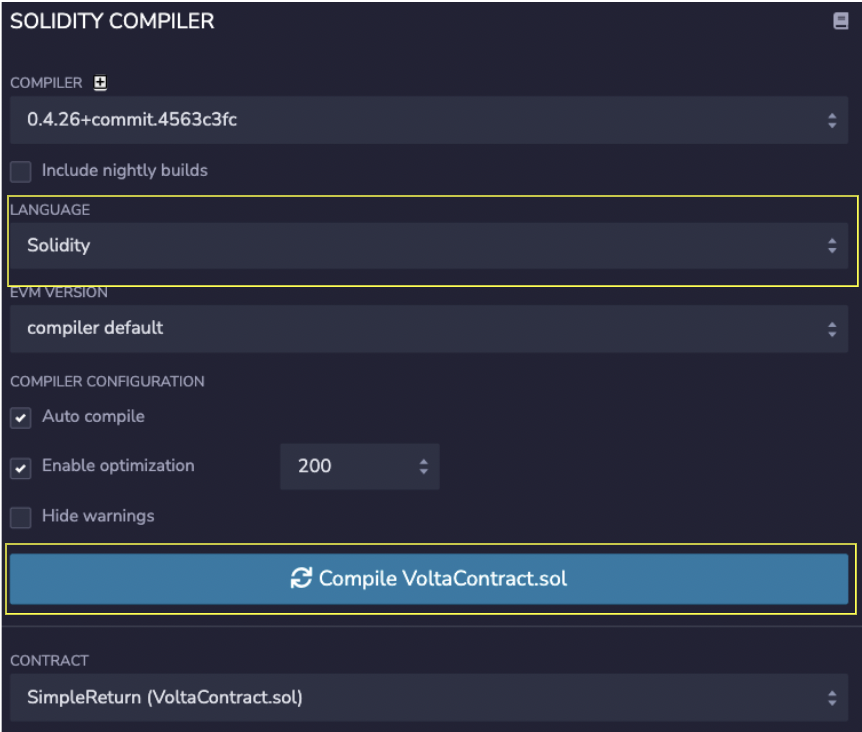
7. Compile the smart contract
If there are no errors, click "Compile VoltaContract.sol" (make sure that the 'Language' selected is 'Solidity').
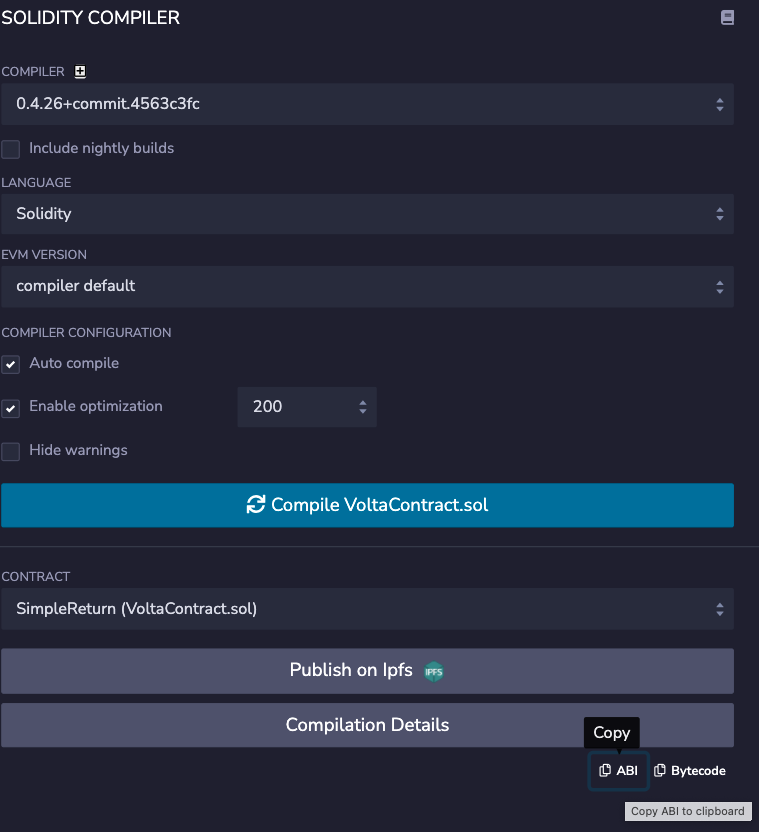
8. Copy the deployed contract's ABI (Application Binary Interface)
If you want to interact with your contract in the future using an API client, you will need the contract's ABI. The ABI is in the bottom right hand corner of the Solidity Compiler page after it is compiled.
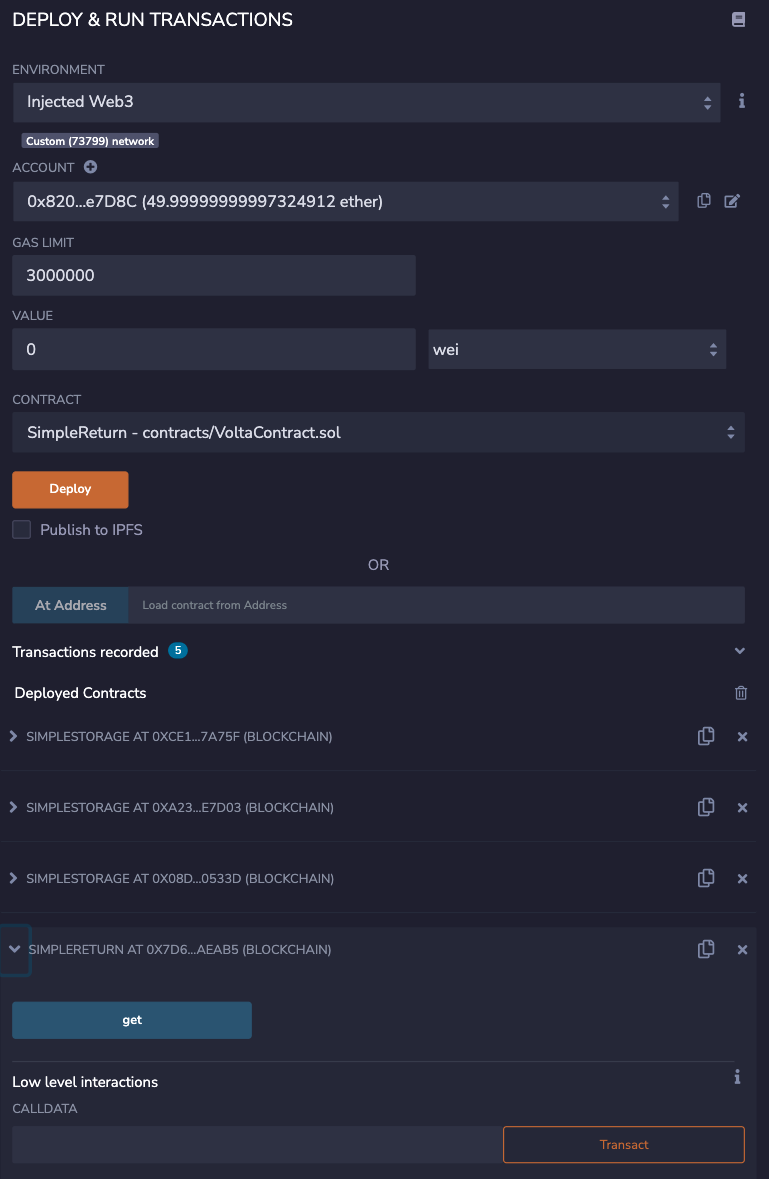
9. Deploy the smart contract
Click 'Deploy' to deploy the contract to Volta Test Network.
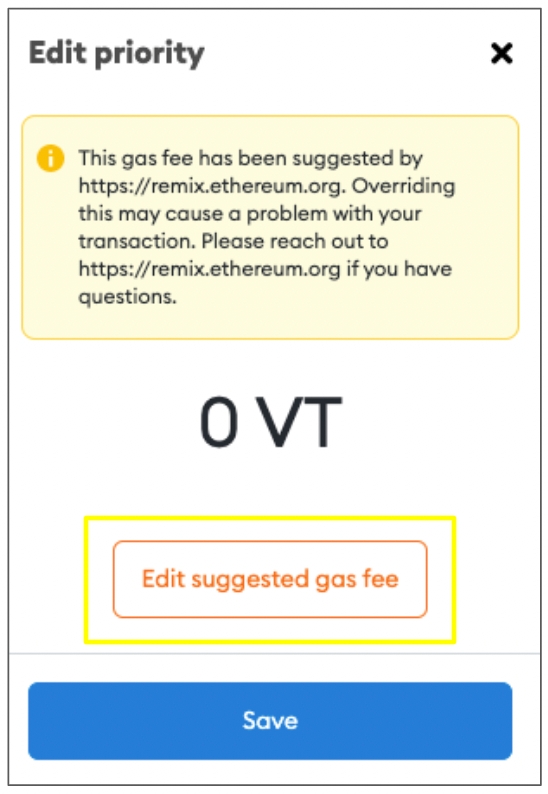
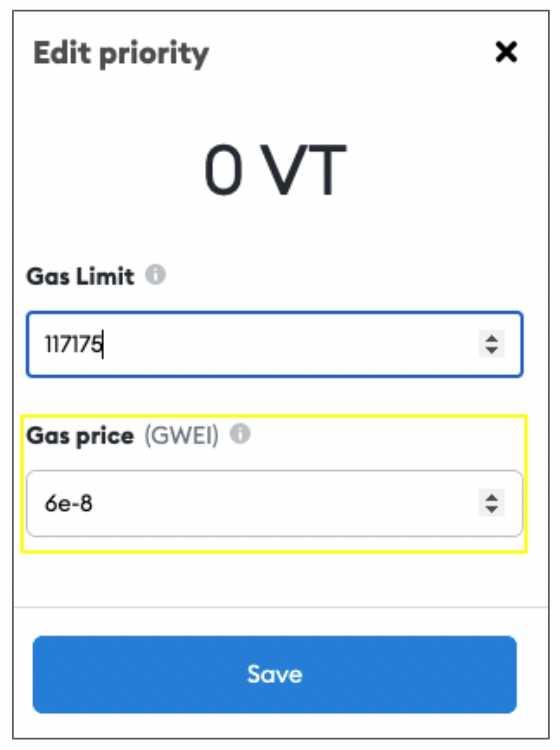
Confirm the transaction in MetaMask. Make sure that you have some gwei as a gas price by doing the following:
Select EDIT
Select "Edit suggested gas fee"
Make sure you have a Gas price of 6e-8 GWEI (this should be autofilled)
Confirm the transaction in MetaMask
10. See and test the deployed transaction
Once your contract is deployed, you can see it in the "Deployed Contracts" section of the same page ("Deploy and Run Transactions")
Click on "get" to test our contract's functionality. Remember from the code that is should just return a string "Volta".
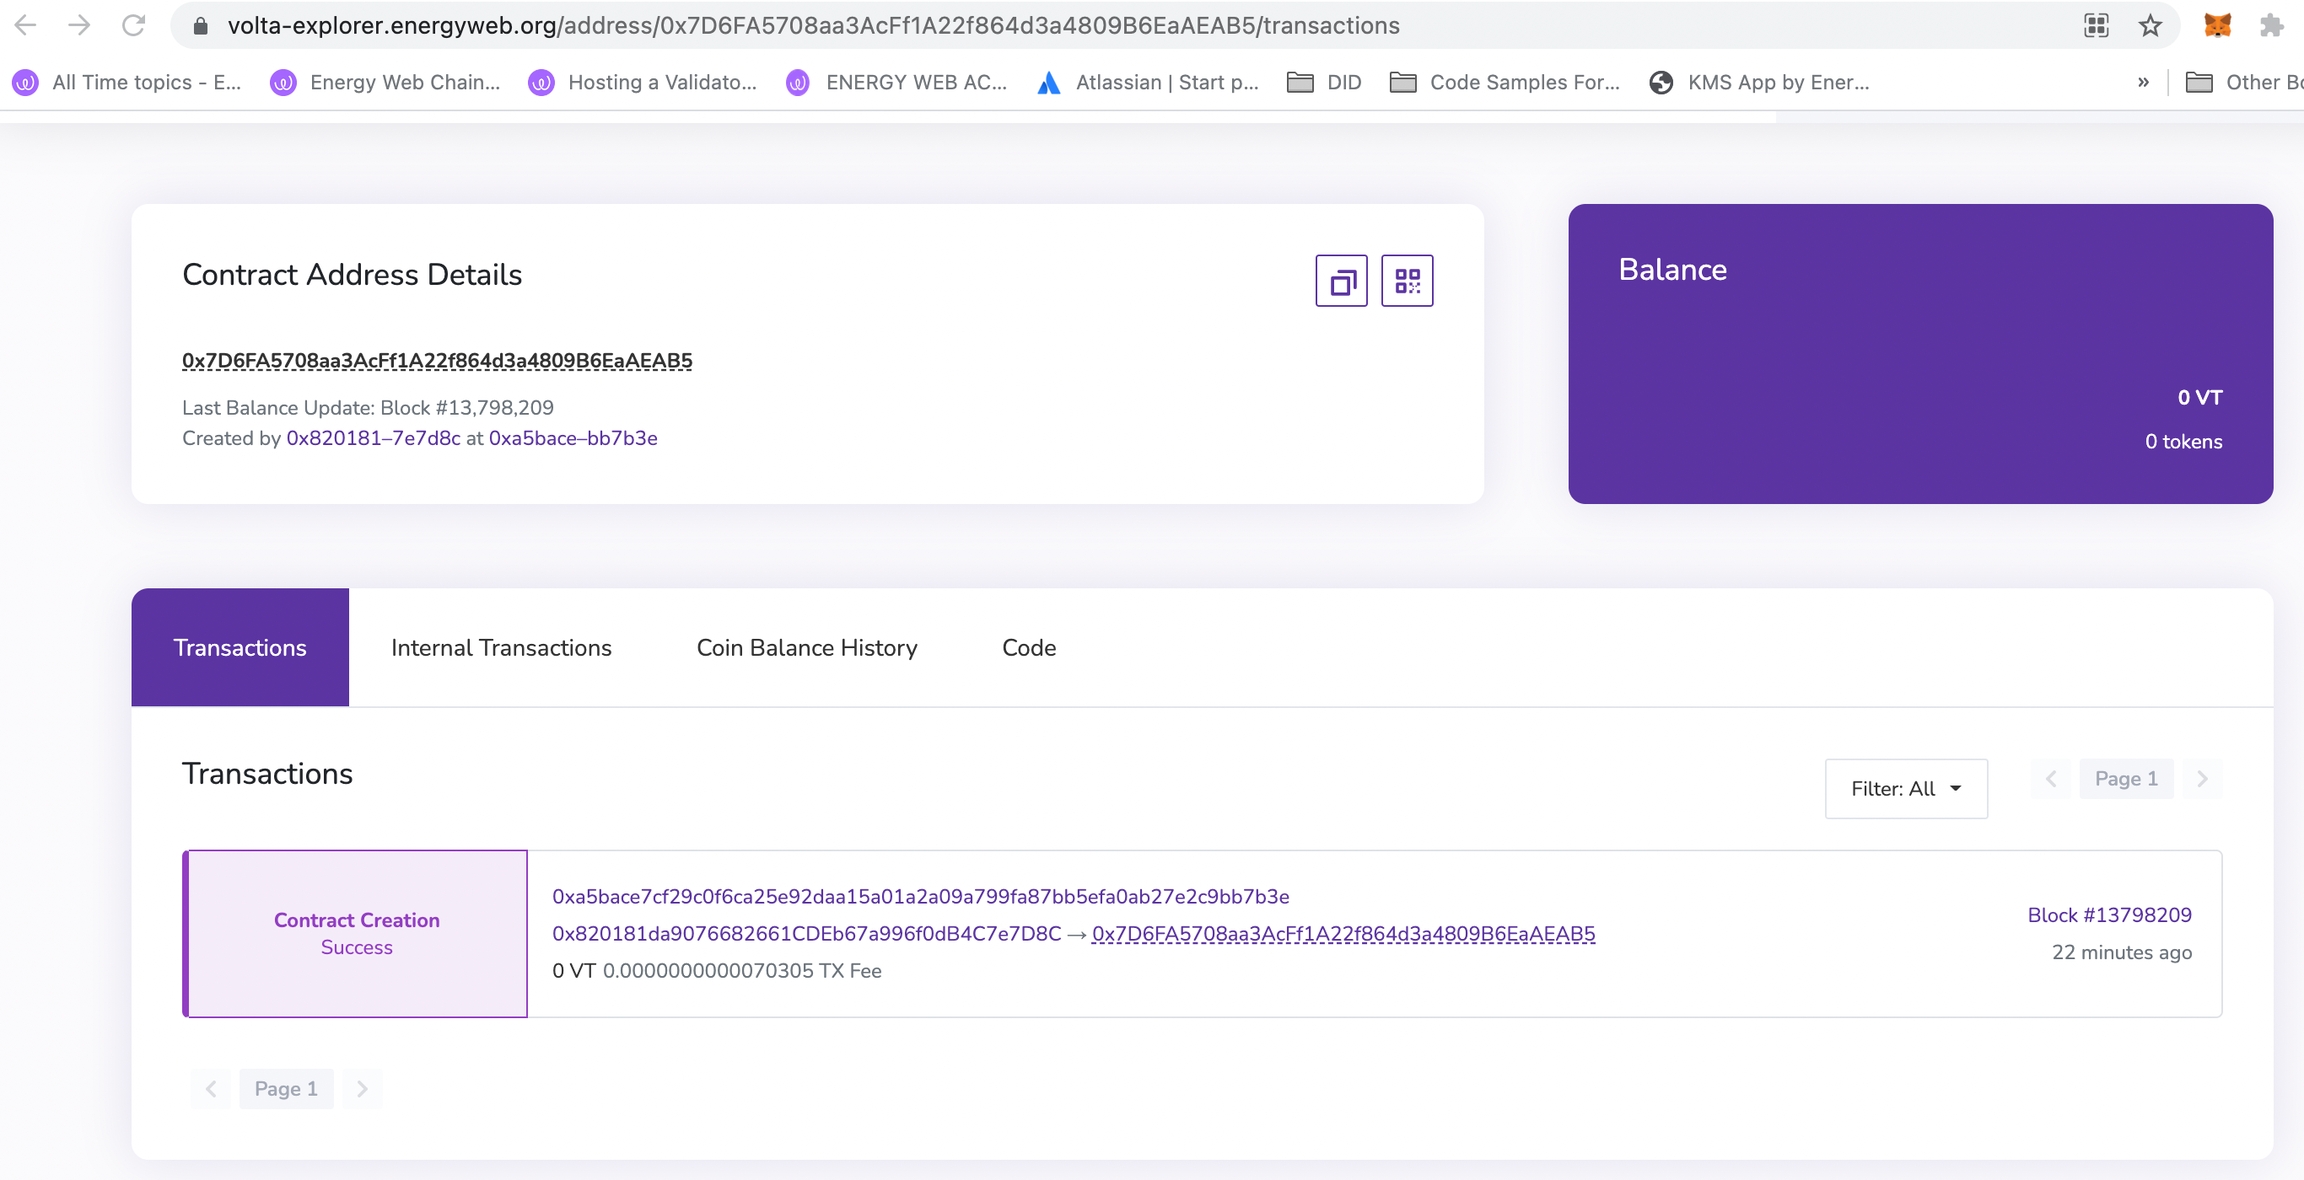
11. See deployed contract on the Volta Block Explorer
Copy the address of the contract by clicking the copy icon.
Go to the Volta Block Explorer (volta-explorer.energyweb.org). If you are deploying to the main network, the block explorer is explorer.energyweb.org.
Paste the contract address in the search bar at the top right:
You can see the smart contract address details, the block it was created in, and the byte code. The block explorer contract details from the example above is here.
12. Use your smart contract in dapps
Now that you have your smart contract's address on the blockchain and its ABI, you can use an Ethereum API client to interact with your contract in your decentralized applications. For a tutorial on how to do this, go here.
pageInteracting with Smart Contracts in EW-DOSLast updated